Master the Art of Making Authentic Ukrainian Varenyky
Key Ingredients for Perfecting Your Varenyky Dough
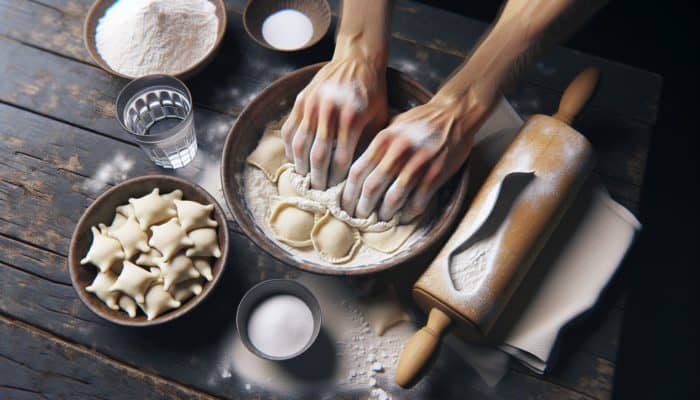
To create the perfect varenyky, it all starts with a robust foundation: the dough. This essential element relies on three primary ingredients: flour, water, and salt. The type of flour you select plays a crucial role in shaping the texture of your dough. For optimal results, choose all-purpose flour, which balances elasticity and tenderness, facilitating easier handling. A practical flour-to-water ratio of about 2:1 serves as a guideline, though you may need to adjust this based on environmental conditions and the specific flour type you are using.
After measuring your ingredients, mix them in a large bowl. Slowly incorporate the water while stirring with a fork or your hands until the mixture forms a rough dough. Knead the dough on a floured surface for about 10 minutes, striving for a smooth and elastic end product. Should the dough feel too sticky, add more flour; if it’s too dry, a splash more water should help. Once you achieve the right consistency, let the dough rest beneath a damp cloth for at least 30 minutes to allow the gluten to relax.
Selecting the Perfect Filling for Your Varenyky
The filling of your varenyky is where your culinary imagination can flourish. Classic fillings include potato, cheese, and various fruits. Each option introduces its unique flavors and textures, making the selection process an exhilarating journey. For a traditional potato filling, opt for creamy russet potatoes. Boil and mash them, then blend in sautéed onions along with a pinch of salt. Alternatively, for a delightful cheese filling, mix farmer’s cheese with garlic or fresh herbs to enrich the taste.
If you’re in the mood for something different, consider experimenting with fruit fillings. Sweet varenyky filled with fresh berries, cherries, or diced apples can create a pleasing contrast to the savory dough. Always prioritize using fresh, ripe ingredients to maximize flavor and ensure a delightful taste experience. Embrace the chance to innovate; remember that the filling truly determines the character and allure of your varenyky.
Enhancing Your Varenyky with Additional Flavorful Ingredients
To amplify the flavor profile of your varenyky, consider incorporating an array of herbs, spices, and seasonings. Fresh dill and parsley are classic flavor enhancers that beautifully complement savory fillings. A hint of black pepper or a dash of smoked paprika can deepen the flavor of your potato filling, while a sprinkle of cinnamon can elevate sweet fruit fillings. Always consider how these flavors will blend with your main filling to create a harmonious taste experience.
Moreover, incorporating sautéed onions or garlic into your fillings can establish an aromatic base that enhances the overall flavors. Be sure to chop these ingredients finely for even distribution within the filling. Tasting as you go is vital; this practice allows you to craft a filling that excites the palate and perfectly complements the dough.
Storing and Utilizing Leftover Dough Effectively
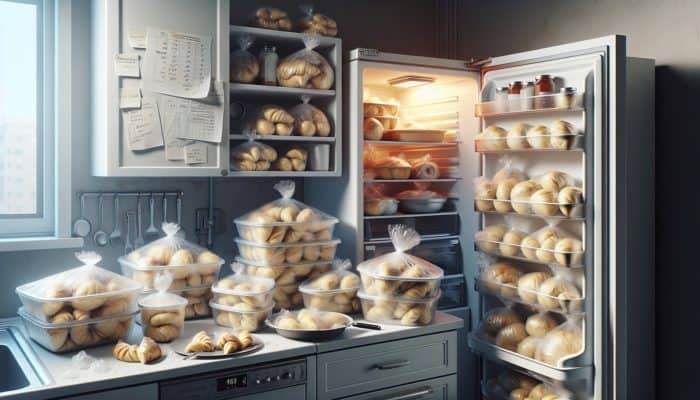
Leftover dough is a hidden gem of culinary potential! If you have extra dough after making your varenyky, there’s no need to worry. Proper storage can significantly extend its lifespan. You can refrigerate the dough for up to two days by wrapping it securely in plastic wrap or placing it in an airtight container to keep it from drying out. When you’re ready to use it again, allow the dough to reach room temperature before rolling it out for your next batch.
For longer-term storage, freezing is a fantastic option. Divide the remaining dough into manageable portions, wrap them tightly, and store them in a freezer-safe bag. When you’re ready to whip up another batch of varenyky, thaw the dough in the refrigerator overnight. This strategy preserves the dough’s quality, ensuring you can create delicious varenyky whenever the craving strikes.
Expert Tips for Cooking Traditional Ukrainian Varenyky
Determining the Ideal Dough Consistency for Varenyky
The consistency of your dough is essential for achieving perfectly cooked varenyky. A well-crafted dough should be soft yet elastic, allowing for easy rolling without tearing. If your dough is too sticky, simply incorporate more flour gradually until you achieve the desired texture. Conversely, if the dough feels dry and crumbly, add a few drops of water while kneading until the consistency improves.
Reflect on practical examples from your kitchen experiences. For instance, in a humid climate, you might find your dough absorbs more moisture, requiring less water than usual. Conversely, in drier conditions, you may need to increase the water content slightly. Always trust your instincts and adjust based on how the dough feels in your hands. The ultimate goal is to create a dough that rolls out effortlessly and maintains its shape when filled and sealed.
Essential Techniques for Sealing Varenyky Effectively
Sealing your varenyky properly is crucial to prevent your delicious fillings from leaking during the cooking process. Start by placing a spoonful of filling in the center of each dough circle. Fold the dough over the filling to create a half-moon shape, ensuring no filling escapes. Gently pinch the edges together, moving from one end to the other, ensuring there are no air pockets trapped inside.
For a more secure seal, consider employing the following techniques:
- Moisten the edges of the dough with a bit of water before sealing; this will help the dough stick better.
- Utilize a fork to press down along the edges, creating both an attractive and functional seal.
- Try twisting the edges for a traditional, decorative appearance.
- Ensure the filling is evenly distributed; overstuffing can easily lead to ruptures while cooking.
Taking the time to seal your varenyky correctly will not only enhance their appearance but also ensure that the flavorful filling remains intact throughout the cooking process.
Exploring the Best Cooking Methods for Varenyky
When it comes to cooking varenyky, you have several methods to choose from: boiling, frying, or baking. Each technique offers distinct textures and flavors, catering to a variety of preferences. Boiling is the most traditional method, favored for its simplicity, resulting in tender, fluffy varenyky that retain their filling’s moisture. To boil, bring a pot of salted water to a rolling boil and cook the varenyky until they float, usually around 3-5 minutes.
Frying, on the other hand, adds a delightful crispness to your varenyky. After boiling, pan-fry them in a touch of oil or butter until golden brown on both sides. This method works particularly well for savory fillings, as the crispy exterior creates a wonderful contrast to the soft, warm interior.
Baking presents a healthier alternative, yielding a unique texture altogether. If you choose to bake your varenyky, ensure to brush them with melted butter before placing them in a preheated oven, enhancing flavor and preventing dryness. Consider the filling when selecting a cooking method; fruit-filled varenyky may shine when boiled, while cheese or potato fillings might benefit from the crispy finish achieved through frying or baking.
Choosing the Most Delicious Filling for Your Varenyky
The world of varenyky fillings is as diverse as it is delicious. Traditional fillings such as potato and cheese remain popular for good reason, but the potential for innovation is limitless. You can explore exciting combinations like sweet potato and feta or ricotta and spinach, pushing the boundaries of what varenyky can be. Always aim for a balanced filling that combines creaminess, saltiness, and perhaps a hint of sweetness, especially when using fruit.
Don’t hesitate to mix and match fillings! For instance, consider blending mashed potatoes with crumbled bacon and chives or a sweet filling of cherries combined with a hint of vanilla. The more creative you become, the more delightful surprises await your taste buds. Always remember to taste your filling mixture before sealing; this practice allows for necessary adjustments, ensuring your varenyky burst with flavor and character.
Creative Presentation Tips for Serving Your Varenyky
Effective presentation can significantly enhance the dining experience when serving varenyky. After boiling or frying, arrange the varenyky on a large platter, ensuring they are not overcrowded. You can garnish them with a dollop of sour cream, a sprinkle of fresh herbs like dill or parsley, and perhaps some crispy fried onions for added texture. Drizzling melted butter over the top not only enriches flavor but also adds an appealing sheen.
Consider serving varenyky alongside a vibrant salad or a comforting bowl of borscht for a complete meal. The color contrast between the varenyky and fresh ingredients creates an attractive visual presentation. During festive occasions, you might want to present them with an assortment of dips and sauces, allowing guests to personalize their flavors. This interactive element can elevate the dining experience, fostering conversation and joy as you share in this cherished dish.
Step-by-Step Guide to Creating Varenyky
Mixing and Kneading the Dough for Your Varenyky
Mixing and kneading the dough represents the crucial first step in crafting your varenyky. Begin by sifting your flour into a large mixing bowl to aerate it, ensuring a light and fluffy dough. Add the salt and mix it thoroughly through the flour to evenly distribute the flavor. Gradually pour in water, using your hands or a wooden spoon to blend everything into a cohesive mixture. The key here is to add water slowly, allowing the flour to absorb it without becoming overly wet.
Once the mixture begins to combine, transfer it to a lightly floured surface to begin kneading. This step is essential, as it develops the gluten in the flour, granting your dough the elasticity needed for rolling. Knead the dough vigorously for about 10 minutes, using the heels of your hands to push the dough away, folding it back over itself, and repeating this process. The dough should become smooth and elastic, feeling soft yet not sticky. If it clings to your hands, sprinkle in a little more flour as necessary.
Rolling and Cutting the Dough for Perfect Varenyky
Once your dough has rested, it’s time to roll it out and cut it into uniform circles. Begin by dividing the dough into manageable portions, keeping the remaining pieces covered to prevent them from drying out. Using a rolling pin, roll out a portion of dough on a lightly floured surface to about 1/8 inch thickness. Aim for even thickness to ensure consistent cooking results. If the dough is too thick, your varenyky will be chewy; if too thin, they may tear easily.
For cutting, use a round cutter, a glass, or even a knife to create uniform pieces. A standard diameter is about 3-4 inches; however, you can adjust this based on your personal preference. As you cut, ensure to re-flour the surface and your cutter to prevent sticking. Gather any scraps of dough, knead them together, and repeat the rolling and cutting process until all the dough has been utilized. This methodical approach not only improves presentation but also facilitates even cooking.
Assembling Your Varenyky: A Step-by-Step Process
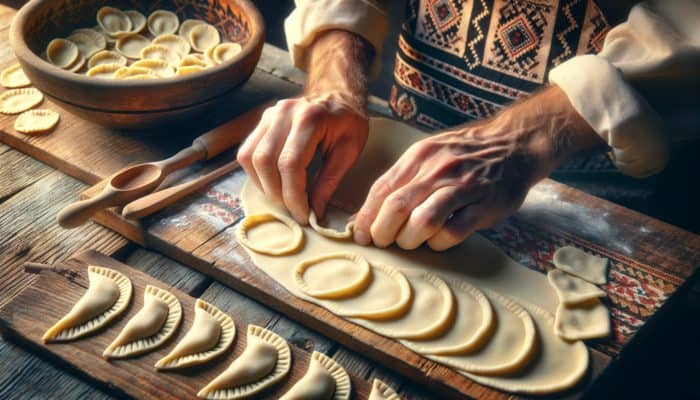
Assembling your varenyky is where the real magic takes place! Take one of your dough circles and place it in the palm of your hand. Using a spoon, add a generous scoop of your selected filling in the center. Be cautious not to overfill, as this can lead to leaks during cooking. The ideal amount is about a tablespoon, providing just enough to showcase the filling without overwhelming the dough.
To seal the varenyky, fold the dough circle in half over the filling, creating a half-moon shape. With your fingers, gently press the edges together, ensuring there are no air pockets trapped inside. For added security, you may crimp the edges using a fork, which also adds a decorative touch. As you assemble each varenyky, place them on a floured surface or a baking sheet lined with parchment paper to avoid sticking. Keep the assembled varenyky covered with a damp cloth to maintain moisture as you work through the remaining dough.
Boiling Varenyky the Traditional Way
Boiling is the most traditional technique for cooking varenyky, resulting in soft, pillowy bites that are simply delightful. Start by filling a large pot with water and adding a generous amount of salt—this will flavor the varenyky as they cook. Bring the water to a rolling boil before adding the varenyky in batches. Be careful not to overcrowd the pot; this can lower the water temperature and lead to uneven cooking.
Once the varenyky are in the pot, stir gently to prevent them from sticking to the bottom. As they cook, watch for them to float to the surface, indicating they are fully cooked. This typically takes about 3-5 minutes. Once they have floated, allow them to cook for an additional minute to ensure thorough cooking. Use a slotted spoon to remove the varenyky, allowing excess water to drain off before transferring them to a serving dish. For an added layer of flavor, toss them in melted butter immediately after boiling.
Enjoying Your Varenyky: Serving and Savoring
Now comes the most enjoyable part—serving and relishing your freshly made varenyky! These delightful dumplings can be served hot and savored on their own, or you can enhance the experience with toppings. A classic choice is a dollop of sour cream, which adds a creamy tang that beautifully complements the soft dough and savory filling. Alternatively, consider melted butter, a sprinkle of crispy fried onions, or fresh herbs to add depth and richness.
Varenyky are incredibly versatile and can be enjoyed as a main dish or served as a side. For a more substantial meal, pair them with a refreshing salad or a comforting bowl of soup, allowing the varenyky to shine as the star of your meal. It’s essential to provide a selection of sauces or toppings, inviting everyone at the table to personalize their dumplings. Regardless of how you serve them, the warmth and flavor of homemade varenyky are sure to create a memorable dining experience.
Enhancing the Flavor of Your Varenyky
Incorporating Fresh Herbs and Spices for Maximum Flavor
Incorporating fresh herbs and spices into your varenyky can transform basic fillings into flavorful masterpieces. Fresh herbs like dill, parsley, and chives can add bursts of freshness that elevate both savory and sweet fillings. For example, adding finely chopped dill to the potato filling creates a delightful combination that balances the creaminess of the potato. Likewise, a sprinkle of fresh chives can introduce a subtle onion flavor to cheese-filled varenyky.
Consider the impact of spices as well. A pinch of nutmeg can enhance sweet fillings, especially those featuring fruits like plums or cherries. Conversely, spices such as black pepper or paprika can add warmth and depth to savory fillings. Experimenting with these additions allows you to discover unique flavor combinations that not only please the palate but also enliven your dishes.
Innovative Filling Ideas for Your Varenyky
The beauty of varenyky lies in their versatility; experimenting with different fillings can keep your culinary adventures exciting. While traditional fillings provide a solid foundation, branching out can lead to delightful surprises. Think outside the box: why not try a combination of roasted garlic and ricotta for a creamy, flavor-packed filling? Or, for a sweet twist, consider blending mashed banana with cinnamon and a touch of sugar?
To keep things interesting, consider incorporating seasonal ingredients. In the summer, fresh zucchini mixed with feta can create a refreshing filling, while autumn calls for spiced pumpkin or butternut squash. The key is to balance flavors and textures, ensuring each bite remains harmonious. Embracing new fillings can result in exciting variations of this classic dish, making every meal a unique experience.
Delicious Sauces That Complement Varenyky
The choice of sauce can elevate your varenyky from ordinary to extraordinary. Traditional pairings include sour cream and melted butter, both of which complement the dumplings beautifully. Sour cream adds a tangy richness that balances savory fillings, while melted butter provides a luxurious coating that enhances the overall experience. You might also caramelize onions, which introduce a depth of flavor through their sweet, rich character.
If serving sweet varenyky, consider drizzling them with a fruit compote or a spoonful of jam. A dollop of whipped cream can also work wonders, enhancing the sweetness while adding a light, airy texture. Exploring different sauces allows you to customize your meal and cater to various taste preferences, transforming each serving into a unique experience full of flavor.
Research-Backed Benefits of Cooking Classic Ukrainian Varenyky
Nutritional Profile of Varenyky: A Healthy Meal Choice
Varenyky, when made with wholesome ingredients, can provide a nutritious meal option. The choice of fillings significantly influences their health benefits. For instance, potato-filled varenyky offer a good source of carbohydrates, while cheese fillings can contribute protein and calcium. Incorporating vegetables like spinach or <a href="https://limitsofstrategy.com/smoke-mushrooms-for-umami-flavor-your-quick-guide/">mushrooms</a> not only brings vibrant flavors but also enhances the overall nutritional profile.
The dough itself, crafted from simple ingredients like flour and water, can contribute to a balanced diet when paired with nutrient-dense fillings. Opting for whole grain flour increases fiber content, making varenyky a more health-conscious choice. It’s essential to consider portion sizes and pairings; serving them alongside a fresh salad or soup can create a well-rounded meal that satisfies hunger while nourishing the body.
Cultural Importance of Varenyky in Eastern European Traditions
The cultural significance of varenyky extends far beyond their delightful taste. These dumplings are often linked to family gatherings, celebrations, and traditional feasts. In many Eastern European cultures, preparing varenyky is a communal activity that fosters connections and traditions across generations.
In Ukraine, for example, varenyky are frequently served during holidays and festive occasions, symbolizing abundance and prosperity. The act of making them together creates lasting memories and strengthens familial bonds. Understanding the cultural importance of varenyky enriches your cooking experience, reminding you that each dumpling you prepare carries a legacy of tradition and love.
How Cooking Varenyky Encourages Family Bonding
The process of preparing and enjoying varenyky serves as a wonderful opportunity to foster family bonding. Involving family members in the cooking process creates chances for shared experiences and storytelling. From mixing the dough to filling and sealing the varenyky, each step provides an opportunity for interaction and collaboration. Whether you have children helping at the table or older generations sharing their tips, these moments strengthen connections.
To make the experience even more engaging, consider hosting a varenyky party where each family member can create their unique filling combination. This allows everyone to express their creativity and preferences while enjoying the company of others. Ultimately, cooking varenyky together not only results in delicious food but also creates lasting memories that family members will cherish for years to come.
Serving and Enjoying Varenyky: Best Practices
Plating Techniques for an Impressive Varenyky Presentation
When it comes to plating varenyky, presentation is key. A well-presented dish not only enhances the dining experience but also reflects the care and effort invested in preparation. Begin by arranging the varenyky in a circular pattern on a large serving platter, allowing guests to appreciate their appearance. For a personal touch, consider serving them in individual bowls, each topped with a different sauce or garnish.
To enhance visual appeal, incorporate contrasting colors—bright green herbs like dill or parsley make beautiful garnishes. Drizzling melted butter over the varenyky for a glossy finish, or sprinkling some toasted seeds or nuts for added texture, can elevate the presentation. The goal is to create a plate that not only looks enticing but also invites everyone to dig in and savor the delicious flavors you’ve crafted.
The Best Side Dishes to Pair with Varenyky
Complementing varenyky with the right side dishes can enhance your meal, creating a harmonious dining experience. Consider serving them alongside a classic borscht, which offers a vibrant and hearty contrast. A light salad made from fresh greens, tomatoes, and cucumbers can refresh the palate between bites of rich varenyky.
For a heartier option, pair your varenyky with roasted vegetables or a warm grain salad, providing a delightful balance of flavors and textures. Alternatively, a creamy soup can warm the soul and enhance the overall experience. The key is to choose sides that complement and elevate the flavors of the varenyky, creating a well-rounded meal that satisfies various tastes.
Best Practices for Storing and Reheating Varenyky
Proper storage and reheating techniques are vital for maintaining the deliciousness of leftover varenyky. To store, place them in an airtight container, separating layers with parchment paper to prevent sticking. When stored correctly, varenyky can last in the fridge for up to three days. For longer storage, freezing is an excellent option—ensure they are well-wrapped to prevent freezer burn.
When it’s time to enjoy your leftovers, reheating is key to preserving their texture. For boiled varenyky, gently reheat them in a pot of boiling water for a few minutes until heated through. Alternatively, you can pan-fry them in a little oil for a crispy finish. If you have baked varenyky, pop them in a preheated oven at 180°C (350°F) for about 10-15 minutes to warm through. These methods ensure your varenyky remain delicious and ready to be enjoyed again.
Pairing Varenyky with Sauces and Toppings for Maximum Flavor
The right sauces and toppings can elevate your varenyky to new heights. Traditional accompaniments like sour cream and melted butter are always popular, but don’t hesitate to explore other options. For a twist, consider adding caramelized or crispy bacon bits on top, which provide a delightful crunch and flavor contrast.
If you’re serving sweet varenyky, a drizzle of fruit sauce or compote can beautifully enhance their sweetness. A sprinkle of powdered sugar is also a simple yet effective touch. Experimenting with different sauces and toppings allows you to create a unique dining experience each time you serve varenyky, making every meal an adventure full of flavor.
Enjoying Varenyky Throughout the Day: Meal Ideas
Varenyky are incredibly versatile, making them suitable for any meal of the day. For breakfast, serve them alongside scrambled eggs and sautéed vegetables, creating a fulfilling start to the day. At lunch, they pair wonderfully with a light soup or salad, allowing for a nourishing midday meal.
For dinner, varenyky can truly shine as a main dish, especially when accompanied by hearty sides or complemented with meats like roast chicken or pork. Their adaptability makes them a fantastic option for meal prepping, ensuring a delicious, satisfying dish is ready for any occasion. Regardless of the time of day, varenyky are a beloved choice that consistently delights.
Frequently Asked Questions About Varenyky: Your Essential Guide
What is the origin of varenyky and their cultural significance?
Varenyky are traditional Ukrainian dumplings with origins that trace back centuries. They are often associated with family gatherings and festive occasions in Eastern European cultures, symbolizing abundance and togetherness.
Can I freeze varenyky before cooking them, and how?
Yes, you can freeze varenyky before cooking. Arrange them on a baking sheet in a single layer until frozen, then transfer them to an airtight container or freezer bag for later use.
What is the best way to cook frozen varenyky for optimal taste?
For frozen varenyky, boil them directly from the freezer. Increase the cooking time slightly, usually around 5-7 minutes, until they float to the surface, indicating they are done.
How long can I store leftover varenyky without losing quality?
You can store leftover varenyky in the refrigerator for up to three days. Ensure they are in an airtight container to maintain freshness.
Can I use whole wheat flour for the dough, and what changes will it bring?
Yes, whole wheat flour can be used to make varenyky dough. It will impart a nuttier flavor and denser texture, but you may need to adjust the water content accordingly.
What are some popular fillings for varenyky that everyone loves?
Popular fillings for varenyky include potato, cheese, sauerkraut, meat, and various fruits. You can also create unique combinations to suit your taste.
How do I prevent varenyky from sticking together while cooking them?
To prevent sticking, ensure the varenyky are well-floured before cooking. You can also stir gently while they boil to keep them from clumping together.
What are some traditional toppings for varenyky that enhance their flavor?
Traditional toppings for varenyky include sour cream, melted butter, fried onions, or fresh herbs. Each adds a unique flavor that beautifully complements the dumplings.
Can I make varenyky ahead of time for convenience?
Absolutely! You can prepare varenyky ahead of time, either by boiling or freezing them, making them a perfect option for meal prep or gatherings.
Are varenyky gluten-free, and how can I modify them?
Traditional varenyky are not gluten-free due to the flour used in the dough. However, you can substitute gluten-free flour blends to create a gluten-free version.
Connect with us on Facebook!
The post How to Cook a Classic Ukrainian Varenyky: A Step-by-Step Guide appeared first on https://cookinggods.com
The Article Classic Ukrainian Varenyky: Your Step-by-Step Cooking Guide Was Found On https://limitsofstrategy.com